Wednesday, September 30, 2015

Sprite Position and Direction

  1. "U1L2-Interface"Start a New Project called U1L2-Interface
    Creating a New Project   Starting a New Project
    1. If there is a Snap! file open, save it.
    2. Go to the Snap! File menu, File button, and choose "New".
    3. Click "Yes" to replace the current project.
    4. In the Snap! File menu, File button, choose either "Save" or "Save as..."
    5. Name the file "U1L2-Interface"
  2. There are also other backgrounds built into Snap! that you can use for other projects.
  3. Change the background on your stage so that you see the coordinate plane grid and axes.
    Changing the Background 
    1. In the Sprite Corral, select the Stage thumbnail.
    2. Then, choose "Backgrounds" from the Snap! File menu, File button .
    3. Choose "xy-grid.gif" to show the grid.
  4. Turn on watchers to show the direction of the sprite and its x and y coordinates.
    Adding Sprite Watchers 
    1. In the blue Motion palette, click on the gray checkbox next to the x position block. Drag the sprite around and to see the watcher display the changing x-position of the sprite.
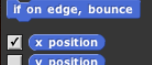
      X Position block's checkbox X Position stage watcher
    2. Create watchers for y position and direction by checking their boxes in the same palette. Move the sprite around using commands or by just dragging it with your mouse. Notice which actions change which values.
Your stage should look like this with axes, a grid, the origin, and 3 watchers: x-position, y-position, and direction.
The coordinates in Snap! are only integers.
In many programing languages, the origin is at the upper left corner of the screen and the numbers go up to the right and up as you go down the screen.
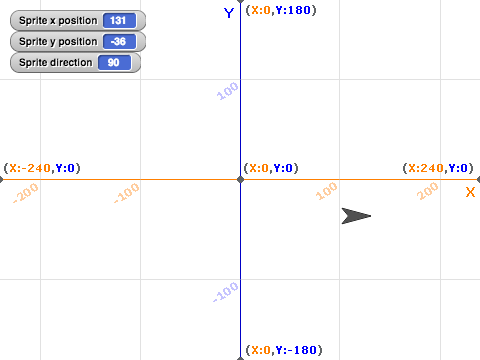
Coordinate Grid
Take turns speaking Coordinate systems for computer screens may be set up differently than in mathematics.
  • In Snap!, the origin, (0, 0), is in the middle of the stage and the signs of the coordinates in the quadrants are the same as in algebra.
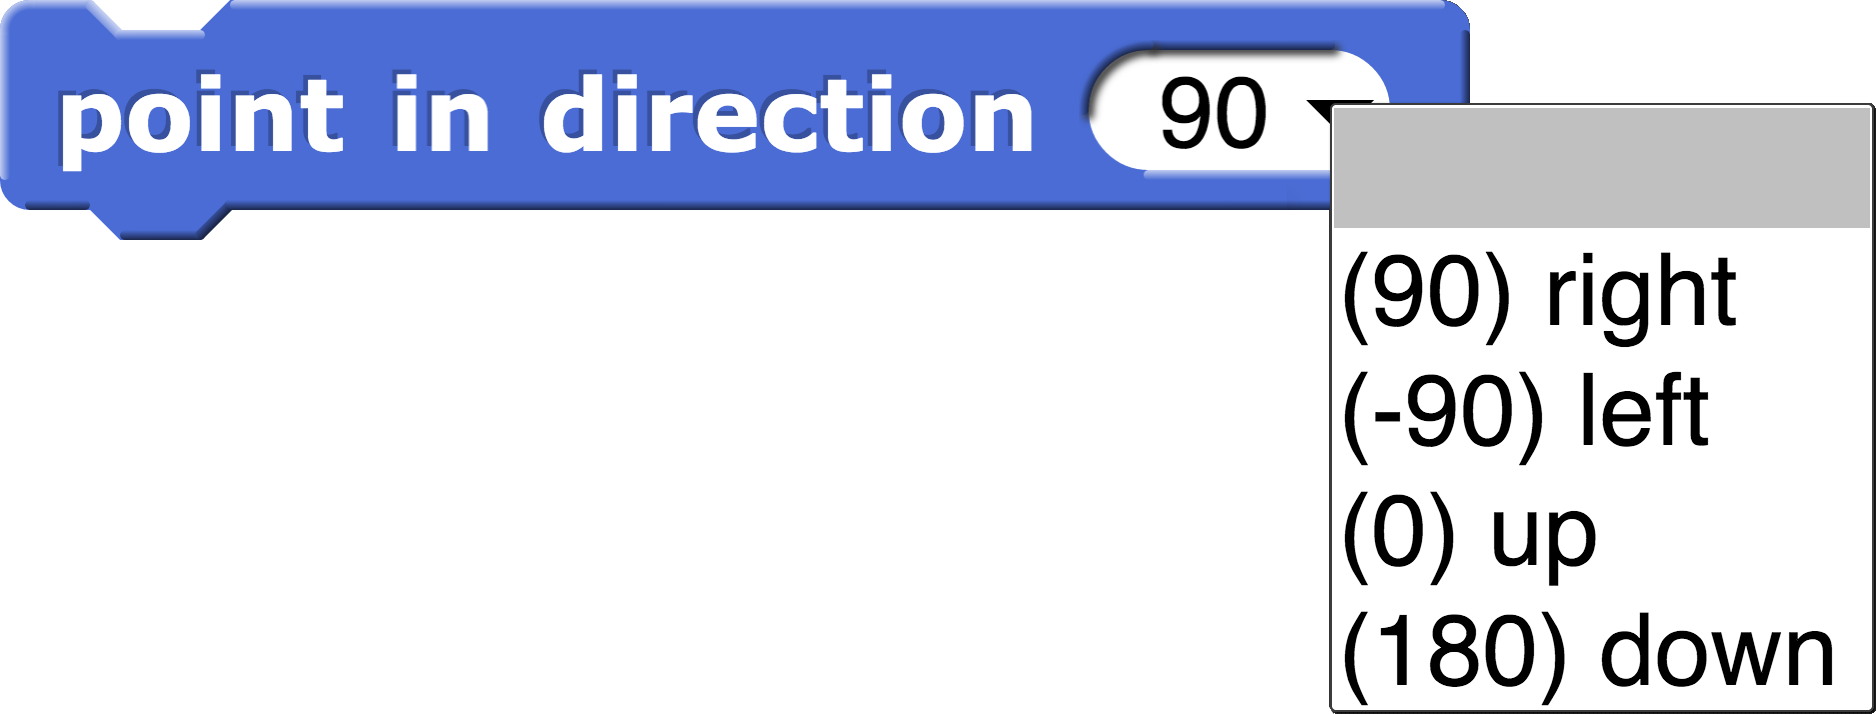
  • Unlike mathematical convention, the numbers naming sprite direction in Snap! start with 0 at the top and count up in degrees going clockwise.
    grid and axes on Snap stage with sprite watchers
  1. What are the position coordinates of the sprite in the image above?
  2. In what direction is the sprite pointing?
  3. The tip of the sprite arrow is the point in question.
  4. Experiment by dragging around a sprite image (sprite) to make sure you see which part of the sprite graphic the coordinates are describing.
  5. Once the pen is down, it stays down even in a different script. If you want your script to move the sprite without leaving a trace, use the pen up block to "lift the pen."
  6. Assemble a collection of blocks from the "Motion" and "Pen" tabs into a script that, with one click, draws a square or triangle or some other a simple picture. You will almost certainly want at least these blocks:

    Move 10 Steps Block  Turn Right 15 Degrees Block  Clear Block  and Pen Up Block.
  1. This script was intended to create a pentagon, but it has bugs. Without building it, try to figure out what it does instead. Then build it and try it out. What change(s) would fix this script?
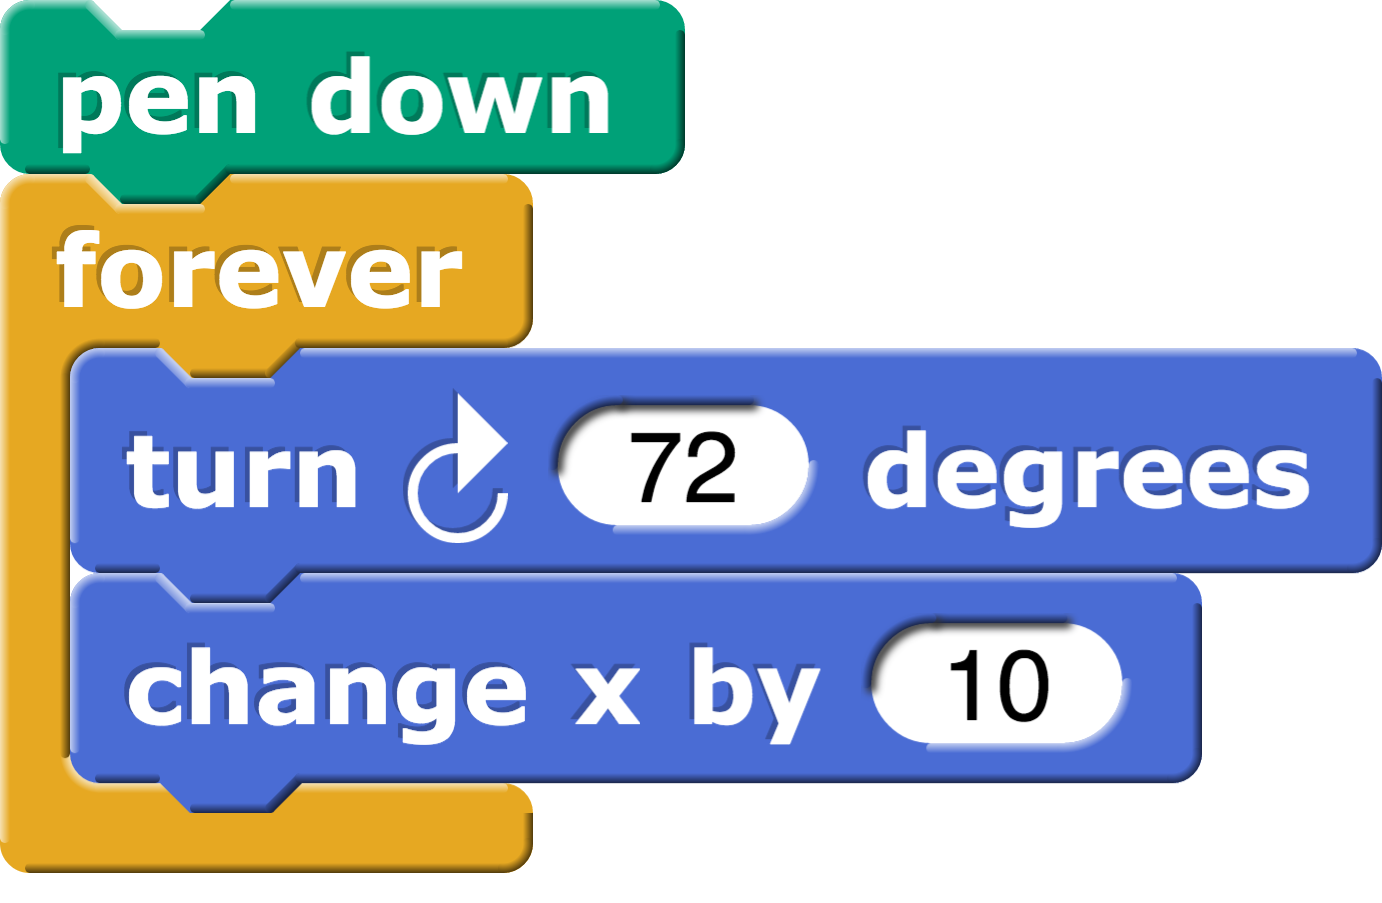
    penDown, forever (turn CW 10 deg, change x by 10)
  2. Create a program with the x-y-grid in the background that labels each of the quadrants with the signs of their coordinates.

Snap! Accounts and Files

Creating an account will allow you to save your programs to the cloud.
  1. Open Snap! using this URL: http://snap.berkeley.edu/run, and bookmark it so you can access it easily.
  2. In Snap!, you will save your work to the cloud. According to howstuffworks.com, cloud storage, "refers to saving data to an off-site storage system maintained by a third party. Instead of storing information to your computer's hard drive or other local storage device, you save it to a remote database. The Internet provides the connection between your computer and the database."
  3. Click the cloud menu, Cloud button, in the toolbar:
    cloud icon
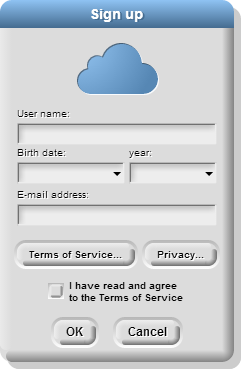
  4. Select the "sign up" option in the menu, and follow the instructions.
    signing up for the cloud
  5. Check your email to get your initial password. Using email is important to digital work.
  6. You may change your password at any time via the cloud menu, Cloud button. Always choose passwords that you can remember but are hard for others to guess.
  7. Return to Snap!, and enter your user name together with the password you receive to log in.
  8. Select "Change Password..." from the cloud menu, and change your password to something easy for you to remember but hard for others to guess.
Logging in to Your Snap! Account 
You'll want to be logged in whenever you are coding.
  1. Click the Cloud menu in the toolbar:
    cloud icon
  2. If it says "logout" and then your usename, you don't have to do anything; you are already logged in. Otherwise, choose "login..." and enter your username and password.
  3. Log out (from the Cloud menu) when you are done.

Saving and Opening Projects 

    You can read more about "Saving and Loading Projects and Media" in the Snap Manual pages 14-16.
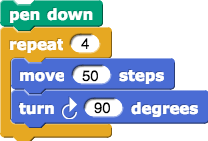
  1. Locate or rebuild the script that draws a square:
    pen down, repeat 4 (move 50 steps, turn CW 90 degrees)
  2. Check if you are logged in by clicking the Cloud menu in the toolbar, Cloud button.
    1. If you see this menu: logoout menu, make sure the username you see is yours. If not, log out and log in with your username.

    2. Log in if you see this menu: login menu
    3. Create an account if you have not done so already.
    It helps keep work organized to name files thoughtfully. In BJC, start your files with the unit and lesson number.
  3. To save your work, go to the File menu File button, and choose "Save" or "Save as...".
  4. Give your project a name that will help you remember what the project is.
  5. "U1L1-Square"Save your work as U1L1-Square
Opening Snap! Projects 
  • Any time you want to access a project, click the File menu File button and select "Open..." to see a list of all your Snap! projects.

Exploring Snap! Code

Exploring Snap! Code

Work with a Partner Share one computer. Take turns typing and reading.
Snap! is a computer programming language. Programs are sets of instructions (called scripts) that tell the computer what to do. Since Snap! is a visual language, you will build your programs by dragging blocks (individual instructions) and snapping them together into scripts.
  1. Bookmark or write down the Snap! link. You will need it every day.
    Use the URL http://snap.berkeley.edu/run to launch Snap! in a new window (or tab).
  2. Build this script. There are instructions below. Then click on the script to see what it does.
    pen down, repeat 4 (move 50 steps, turn CW 90 degrees)
  3. Building a Script   (Yellow boxes are optional reading.) 
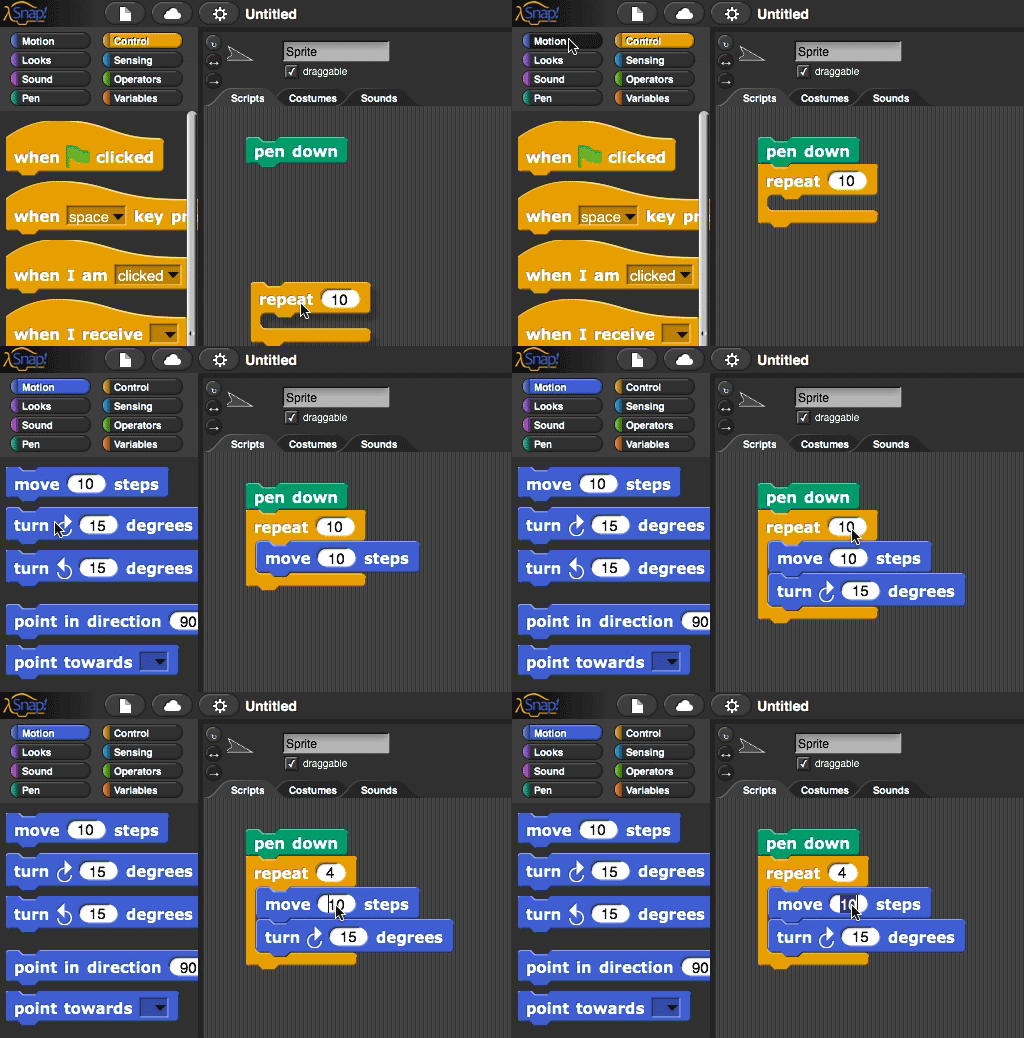
    This animation shows how to build the script. Drag one block underneath another to snap them together. The white bar shows where the block will snap.
    Creating a script
    Instructions
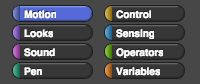
      Motion palette categories: Motion, Looks, Sound, Pen, Control, Sensing, Operators, and VariablesThe blocks' colors match their palettes: blue for Motion, green for Pen, yellow for Control, etc.

    1. Look through the eight palette categories shown at right to find each of the blocks you need for the script. Drag each block into the scripting area and snap them together.
    2. Adjust the numbers to match the script:
      pen down, repeat 4 (move 50 steps, turn CW 90 degrees)
    For You To Do
  4. Talk with Your Partner Discuss what this script does and why.
  5. Talk with Another Pair Discuss the behavior of the script with another pair. If the results are not the same, check that each script matches the model shown above.

Pair Programming Swap

Pair Programming Swap In this course, you will use a technique that professional programmers call pair programming—writing computer programs in teams of two. One partner writes the program; the other partner helps plan and helps catch errors.
Switch roles often, aiming for equal time in each role. If you haven't swapped yet, swap now. Pair Programming Swap
    Reference for the script that draws a square:
    pen down, repeat 4 (move 50 steps, turn CW 90 degrees)
  1. Experiment! What happens if you...
    1. Change the number in the move 50 stepsblock and click the script to run it again?

    2. Change the number in the turn right 90 degrees block and run the script again?
    3. Change the number in the repeat 4 loop?
    4. Click the clear block in the green Pen palette?
  2. You can click clear (or any other block) in its palette or in the scripting area to run it at any time.
    If you click a block that is part of a script, the whole script will run.
  3. Look back at the code that drew a square. Talk with Your Partner Discuss how each block contibutes to the overall behavior.

Pair Programming Swap
  1. Experiment more! Create a program that draws something. Below are other blocks that you may find useful. Find them by their color coding, and click on them to see what they do.
    go to x 0 y 0 point in direction 90 set pen color dark red set pen size to 1
  2. If you see some feature or code that you like, build something like it in your own program.
  3. Share Your Work with another pair. Discuss how each block contibutes to the overall behavior.