Getting to Know the Snap! Interface
Instructions for opening files are in yellow at the bottom of Snap! Accounts and Files.
The - Open the "U1L1-Interface" project file that you created on the previous page.
- Find
 , and click it so you can draw.
 command tells the sprite (located at the tip of the arrow,
 You can click any script (or block) to run it.
-
While a script is running, its border is highlighted. Some scripts run so quickly that you may not notice the brief border flash. This script takes longer to run, so it's easier to notice the highlighted border.Before building this script, predict what it will do.

 Then try it out.

-
Experiment! Look through the tabs in the
color-coded palette menu (shown right) to find each of the blocks below.
Click each block at least once, and figure out what all they do. Try
changing their inputs (number, text, color, etc.) also.


-
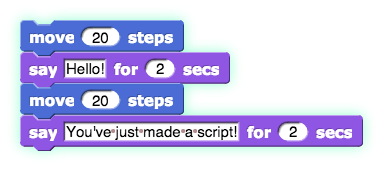
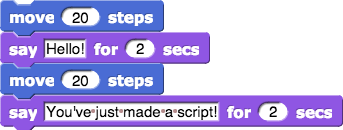
Create this two-block script in the scripting area. Click on it a several times to see what it does.

- Modify the numbers in the two-block script above and
discuss how each change affects the sprite's behavior. Try changing the
numbers so that the sprite follows a square path if your script is
clicked enough times.


Blocks do different kinds of things. Some blocks create changes on the stage. Other blocks report information right where they are:


In general, you need to press  before you can draw. Here, you already pressed it above.
 before you can draw. Here, you already pressed it above.
You may want to clear the stage periodically by finding and clicking the  block.
 block.
No comments:
Post a Comment